Pretty Pink Posh: Watercolor Blog Hop – Delightful Dahlias

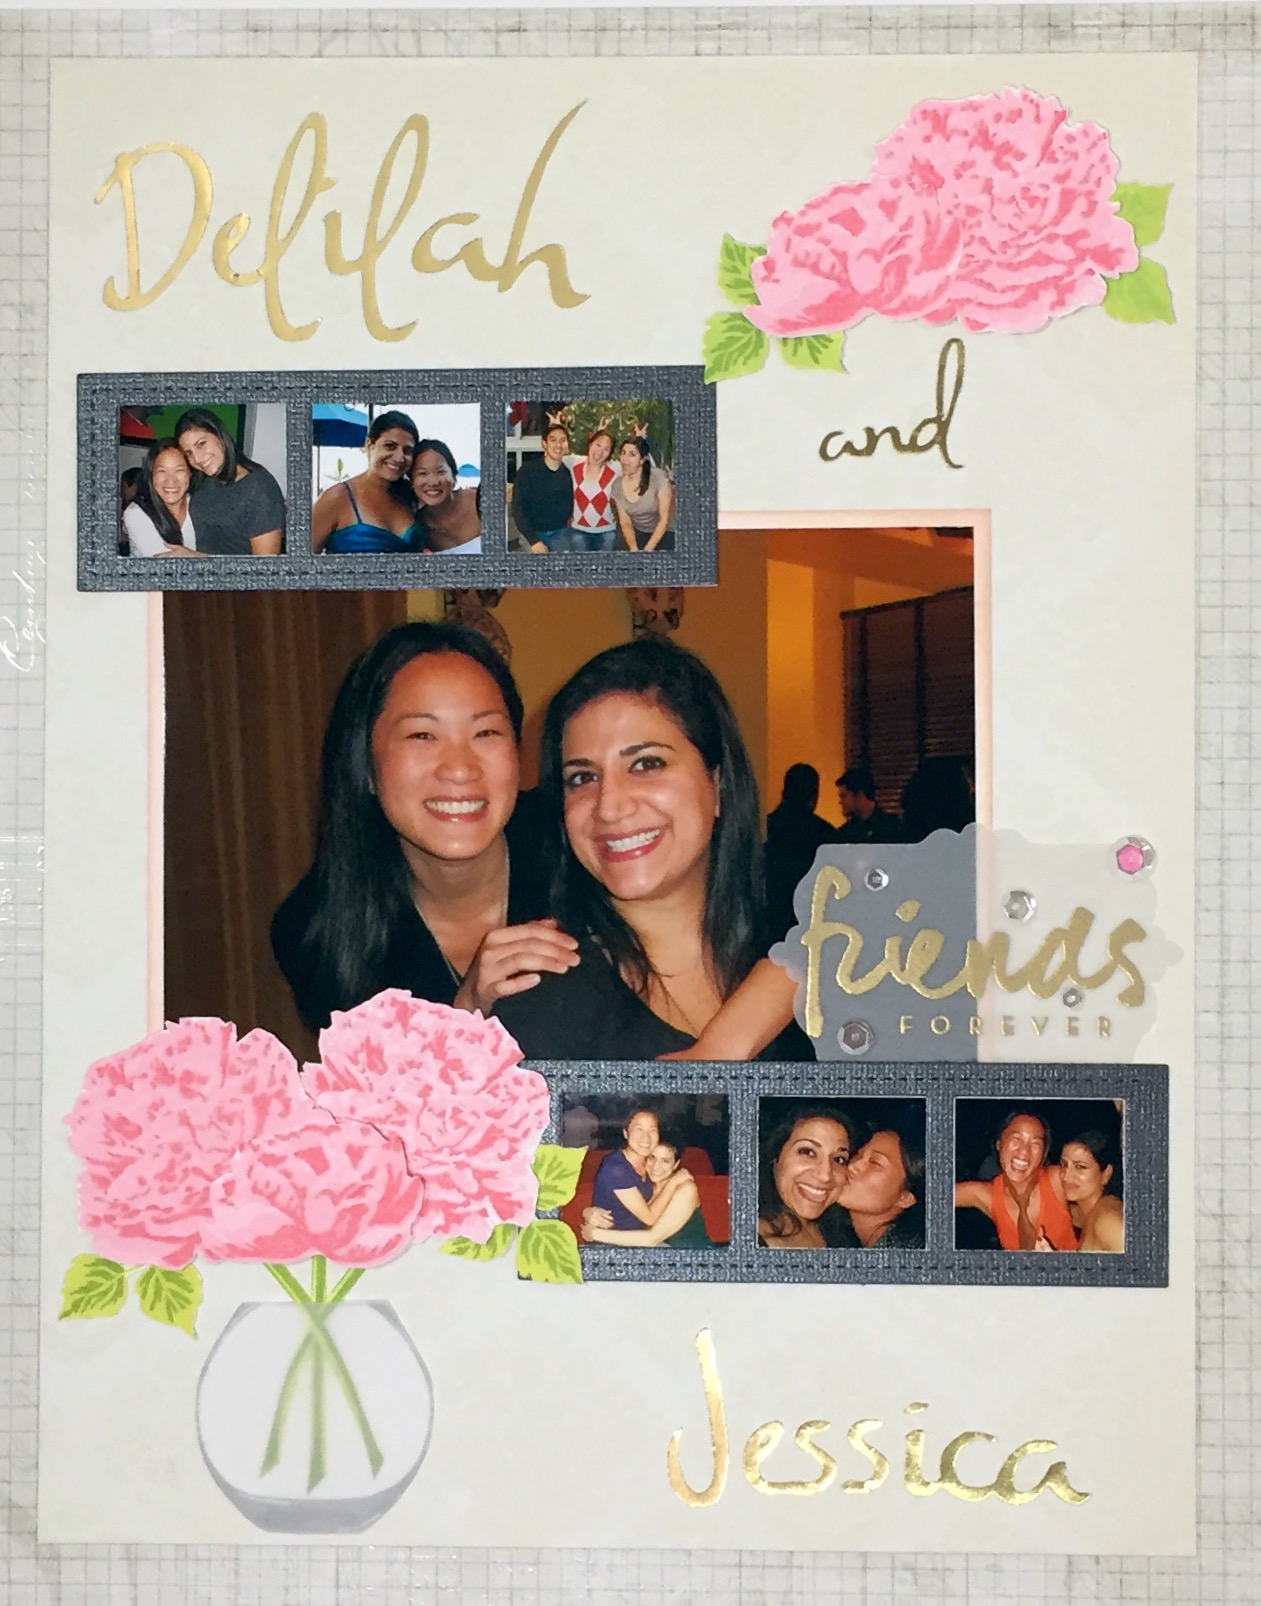
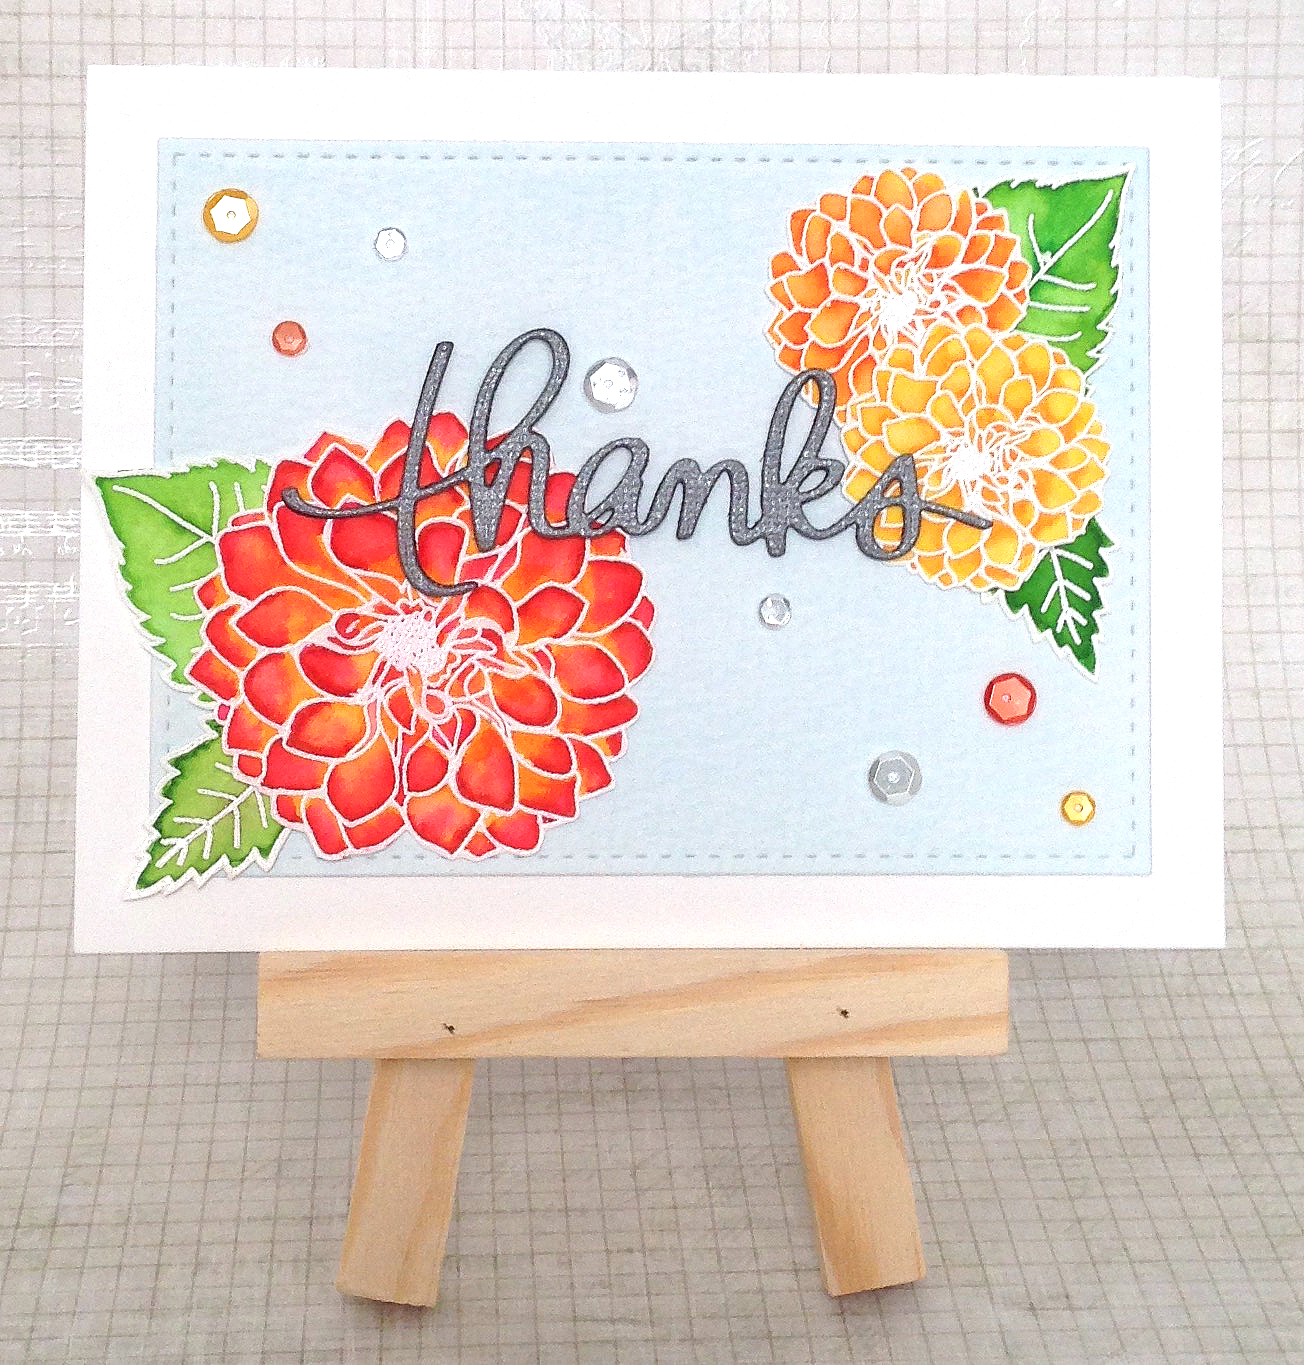
Hi!  I have jumped on the Kuretake Zig Clean Color Real Brush craze and am so excited that they came in time for me to participate in the Pretty Pink Posh Watercolor Blog Hop!!! I ended up ordering the 36-color set from Amazon and they were delivered within the same day as when they shipped!  Gotta love Amazon.  See below for a thank you card that I made for my neighbors using these newly-acquired markers.  I gotta say that they are AMAZING!  I love how vibrant and easy they are to use!!

See below for steps to reproduce:

  1. Create an A2 card base out of Neenah Solar White 110lb. Cardstock
  2. Use the Mama Elephant Basic Set Creative Cuts to cut a stitched rectangle out of Tim Holtz Watercolor Paper and wash with Tumbled Glass Distress Ink
  3. Use the Mama Elephant Thanks Script Creative Cuts to die-cut the sentiment
  4. Stamp the dahlias and leaves from the Papertrey Ink Delightful Dahlia Stamp Set with Versamark Ink onto Tim Holtz Watercolor Paper and heat emboss with Hero Arts White Embossing Powder
  5. Use Kuretake Zig Clean Color Real Brush Markers (022 Carmine Red, 070 Orange050 Yellow052 Bright Yellow, 041 Light Green, 047 May Green) to watercolor the stamped images and fussy-cut
  6. Adhere everything together using the Tombow Mono Adhesive Dots Tape Runner
  7. Embellish with Pretty Pink Posh Sequins (6mm Sparkling Clear, 4mm Sparkling Clear, 6mm Tangerine, 4mm Tangerine, 6mm Marigold, 4mm Marigold) using Zots Bling Dots
  8. Marvel at how vibrant and easily you were able to blend the color on these flowers!!

Thank you so much for visiting my blog today and I hope you get a chance to hop along with Pretty Pink Posh!

Happy Crafting!!

My First Scrapbook Page

I was asked to create a scrapbook page for one of my long-time friends (I’ve known her since Kindergarten!) who is getting married this year!!  I have never created a scrapbook page before and I gotta say, it is HARD to think about what to do with all that space!!!  I am truly grateful that handmade cards have a more manageable, for me, creative space to work on.  I’m not in love with this layout but I had a deadline to meet and after many hours of pulling my hair out, I decided to go with the below:

See below for steps to reproduce:

  1. Grab an 8.5″ x 11″ sheet of patterned paper (I used a sheet of Pretty Party Invitation Pattern Paper by Crate Paper)
  2. Use the Jasmine Cricut Cartridge on an Cricut Expression 2 (or any other electronic die-cutting machine) to cut personalized names out of DCWV gold foil
  3. Die-cut two film strips using the Pretty Pink Posh Film Strip Die out of 80lb. Ash Cardstock from Paper Presentation
  4. Trace the die twice out on 80lb. Neenah Solar White Cardstock and fussy-cut to back the film-strip die-cuts with Honey Bee Scissors
  5. Cut a 4.25″ x 6.25″ rectangle out of 80lb. Neenah Solar White Cardstock and lightly blend Distress Inks (Antique Linen, Spun Sugar) with a mini ink blending tool.
  6. Stamp the vase from The Ton Stamps Fresh Cut Peonies Stamp Set using Hero Arts Soft Granite Shadow Ink on 80lb. Neenah Solar White Cardstock and vellum and fussy-cut
  7. Stamp the three-step flowers from The Ton Stamps Fresh Cut Peonies Stamp Set using Distress Inks (Spun Sugar, Worn Lipstick) with this very helpful stamping guide and MISTI and fussy-cut
  8. Stamp the two-step leaves from the Papertrey Ink The Sweet Life Stamp Set using Avery Elle Pigment Inks (Lemon Grass, Celery) and fussy-cut
  9. Stamp the sentiment from the Papertrey Ink Wet Paint III Stamp Set on vellum using Versamark Ink, heat emboss with Hero Arts Gold Embossing Powder and die-cut using Sizzix Fancy Labels No. 3 Framelits
  10. Embellish with a couple of Pretty Pink Posh sequins (Sparkling Clear Assorted, Pretty Peonies 4mm)
  11. Adhere everything together using the Scotch Advanced Tape Glider and Zig Two-Way Glue Pen
  12. Take a moment to sit back and remember some wonderful times you have had over the years with your life-long friend(s)!!  Make sure to tell them you love them!!

Thank you so much for visiting my blog today and Happy Crafting!

Stamped Menagerie!

Okay….I had to keep playing with my MISTI (Most Incredible Stamp Tool Invented) because I had so much fun with it the other day!  My crafty friend, Rubeena, is on the Design Team for a new stamp company called The Ton Stamps.  Their stamps are very unique and their sequins/confetti (aka Gilding) are in such lovely colors!!  I ended up purchasing their entire line of couture sequin mixes as well as the Sketchy Menagerie Stamp Set.  The moment I saw this stamp set, I knew I wanted to “mount” these animal heads and create some simple masculine notecards.  Whaddya think?!

See below for steps to reproduce:

  1. Create A2 top-folding card bases out of Neenah Solar White 80lb. Cardstock
  2. Stamp the animal heads from The Ton Stamps Sketchy Menagerie Stamp Set and the flourish from JustRite Large Fancy Sentiments Stamp Set using VersaMark Ink and heat emboss with Ranger Liquid Platinum Embossing Powder
  3. Stamp the laurel using the Papertrey Ink Lovely Laurels Stamp Set with Hero Arts Forever Green Shadow Ink
  4. There is no need for you to have to go out and hunt to mount some animal heads!  Enjoy your stamped menagerie!

I will be submitting this set of note cards to Virginia’s View Challenge #13: All Things Embossed!

Thank you so much for visiting my blog today and Happy Crafting!

Mass-Producing Note Card Gift Sets with my MISTI!

I finally caved and purchased the MISTI (Most Incredible Stamp Tool Invented) invented by Iliana.  I had been eyeing it since October and I am so glad I gave into temptation because I ABSOLUTELY LOVE IT!!!  This tool makes mass-producing cards easy peasy!!  How did I ever live without it?!

I created four sets of note cards inspired by the queen of stamping herself, Jennifer McGuire.  Thanks to the lovely Rubeena for introducing me to PTI’s The Sweet Life Stamp Set from this post!

See below for steps to reproduce:

  1. Create A2 top-folding landscape card bases out of Neenah Solar White 80lb. Cardstock
  2. Create stitched rectangles using the Mama Elephant Basic Set Creative Cuts out of Neenah Solar White 80lb. Cardstock
  3. Create 4.25″ x 5.5″ (A2size) rectangles out of Amuse Studio Assorted Cardstock (Blush, Apricot, Lemon Whip, Winter Sky, Amethyst)
    1. Use the My Favorite Things Diagonal Stripes Background Stamp to create a background using Distress Ink (Spun Sugar, Mustard SeedMilled Lavender), Hero Arts Shadow Ink (Soft Sky), Memento Cantaloupe
  4. Stamp the three-step flowers from the Papertrey Ink The Sweet Life Stamp Set using the following inks with this very helpful stamping guide:
    1. Pink Roses: Spun Sugar Distress Ink, Avery Elle Raspberry, Avery Elle Cherry
    2. Orange Roses: Hero Arts Pastel Peach, Memento Cantaloupe, Hero Arts Orange Soda
    3. Yellow Roses: Hero Arts Ink (Pastel Yellow, Lemon Yellow, Butter Bar)
    4. Blue Roses: Hero Arts Soft Sky, Hero Arts Cornflower, Avery Elle Sapphire
    5. Purple Roses: Milled Lavender Distress Ink, Hero Arts Passion Flower, Memento Dye Grape Jelly 
    6. Note: Coming up with these ink combinations took me quite a while and now I have a slew of stamped flowers that I just can’t bring myself to throw away!  Will need to figure out a way to use them so as not to waste them!  Don’t give up hope if you can’t seem to find a good color combo.  The end result is totally worth all the frustration!!
  5. Stamp the two-step leaves from the Papertrey Ink The Sweet Life Stamp Set using Hero Arts Lime Green Ink and Avery Elle Celery Ink
    1. Make sure you create a mask out of acetate or vellum for the flower so that you can use it over and over again when you stamp the leaves
  6. Stamp the sentiments from the Papertrey Ink Wet Paint Stamp Set and Papertrey Ink Wet Paint III Stamp Set using Versafine Onyx Black Ink
  7. Adhere everything together using the Scotch Advanced Tape Glider
  8. Box these notecards up and gift/send some happy mail to a few people in your life!!

Thank you so much for visiting my blog today and Happy Crafting!