Inky Backgrounds with Altenew!

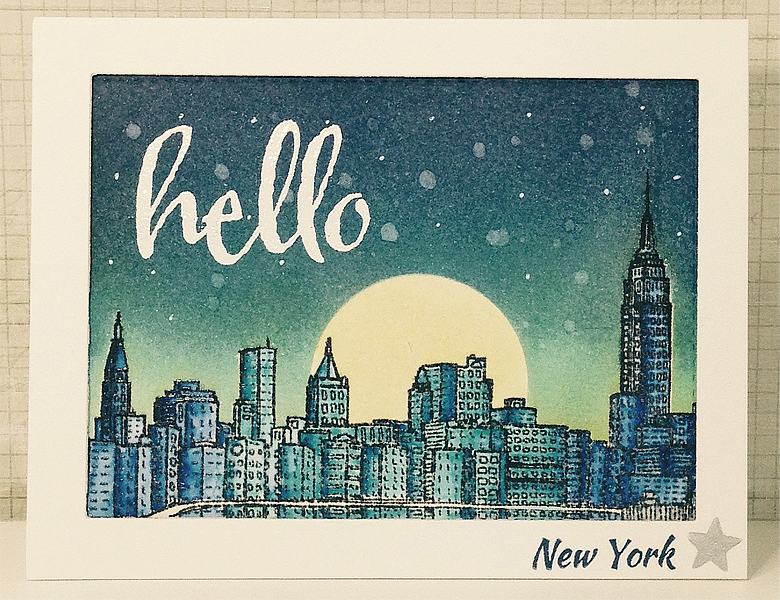
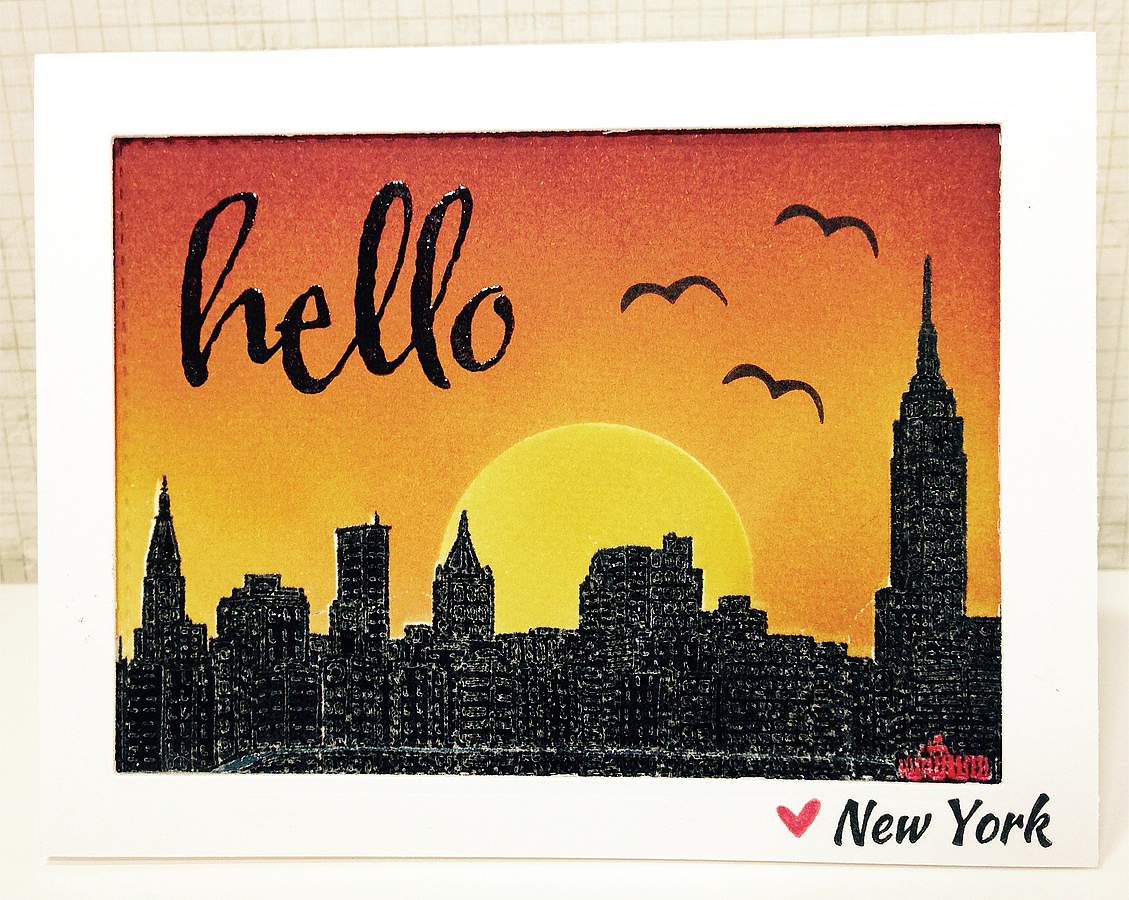
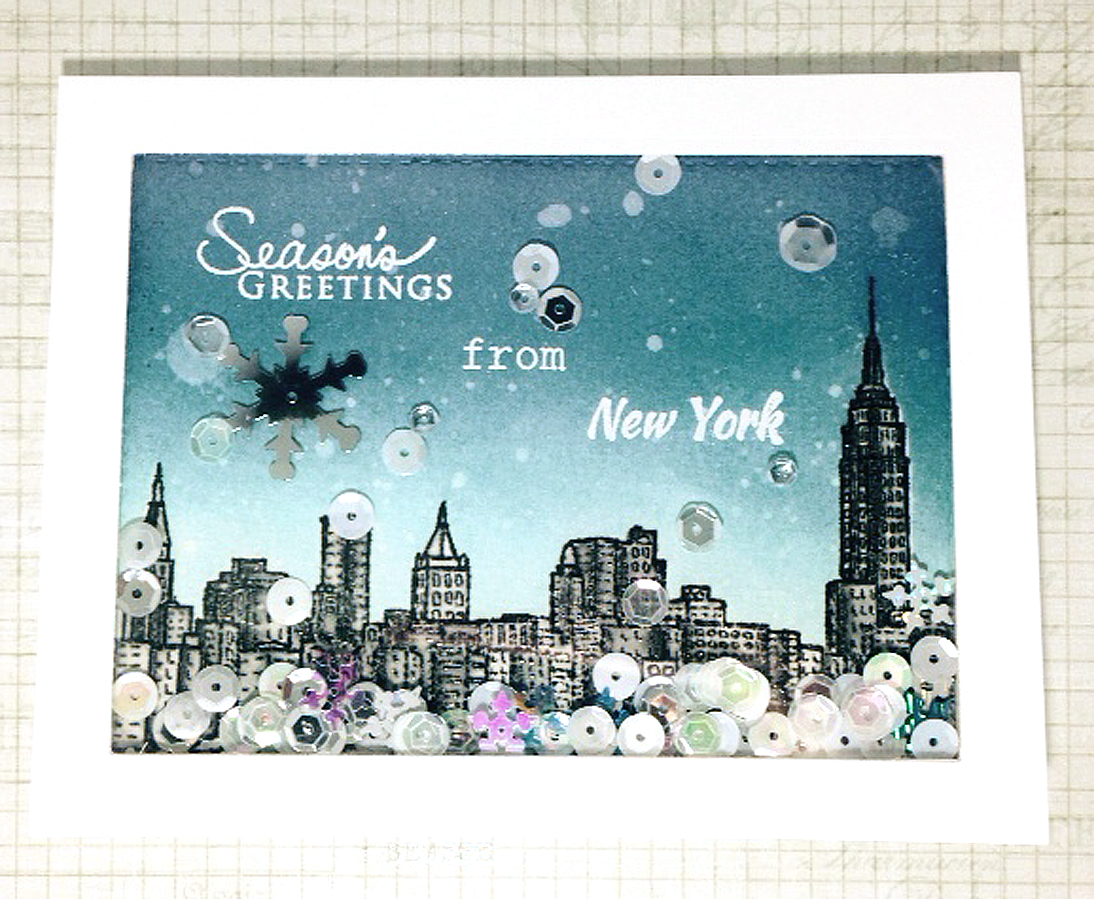
Hi!  I played with my Altenew Sketchy Cities America stamp set for the Altenew Instagram video challenge and the Simon Says Stamp Wednesday Challenge and got super inky with it (and now that Will Smith song is stuck in my head….waaaaah)!!  I couldn’t decide what kind of inky background I wanted so I created three!  And  yes, one is a holiday card but that background was singing christmas carols to me so I just had to do it!  hehe  Do you have a preference over these inky backgrounds behind a gorgeous New York City skyline?!

Altenew Sketchy Cities 2Altenew Sketchy Cities 3See below for steps to reproduce:

  1. Create a cardbase out of Neenah Solar White 110lb. Cardstock
  2. Create a frame using the stitched rectangle die from the Mama Elephant Basic Set Creative Cuts out of Canson 90lb Cold Press Watercolor Paper
  3. Stamp the New York City skyline from the Altenew Sketchy Cities America Stamp Set with Versafine Smokey Gray Ink and heat emboss with Ranger Clear Embossing Powder
  4. Create a mask for the Altenew New York City skyline and a circle out of Inkadinkado Stamping Mask Paper
  5. Mask the cityscape and create inky backgrounds with the following Distress Inks:
    1. Tumbled GlassSalty Ocean, Faded Jeans, Chipped Sapphire
    2. Tumbled GlassSalty Ocean, Faded Jeans, Chipped Sapphire, Dusty Concord, Antique Linen
    3. Mustard Seed, Spiced Marmalade, Barn Door, Dusty Concord
  6. Stamp a sentiment with the Papertrey Ink Signature Christmas Stamp Set, Winnie & Walter The Big The Bold and The Happy and Altenew Sketchy Cities America Stamp Set using Versamark Ink and heat emboss with Hero Arts White embossing powders
  7. Mist some water on the inky background with a Ranger Mini Mister filled with water and Tsukineko Sheer Shimmer Spritz
  8. Adhere the card together using foam tape and double-sided adhesive
  9. Embellish/Fill with some Pretty Pink Posh Sequins (8mm Sparkling Clear6mm Sparkling Clear, 4mm Sparking Clear, 6mm Winter Snow Mix), Doodlebug Lily White Sequins and Simon Says Stamp Snowflake Sequins
  10. Scrub really hard to clean those inky fingers that will take days to go back to normal flesh color!  haha

I will be submitting these cards to the Simon Says Stamp Wednesday Challenge Blog | Use Your Favorite Technique and/or Product.

Thank you so much for visiting my blog today and Happy Crafting!

Stamped Menagerie!

Okay….I had to keep playing with my MISTI (Most Incredible Stamp Tool Invented) because I had so much fun with it the other day!  My crafty friend, Rubeena, is on the Design Team for a new stamp company called The Ton Stamps.  Their stamps are very unique and their sequins/confetti (aka Gilding) are in such lovely colors!!  I ended up purchasing their entire line of couture sequin mixes as well as the Sketchy Menagerie Stamp Set.  The moment I saw this stamp set, I knew I wanted to “mount” these animal heads and create some simple masculine notecards.  Whaddya think?!

See below for steps to reproduce:

  1. Create A2 top-folding card bases out of Neenah Solar White 80lb. Cardstock
  2. Stamp the animal heads from The Ton Stamps Sketchy Menagerie Stamp Set and the flourish from JustRite Large Fancy Sentiments Stamp Set using VersaMark Ink and heat emboss with Ranger Liquid Platinum Embossing Powder
  3. Stamp the laurel using the Papertrey Ink Lovely Laurels Stamp Set with Hero Arts Forever Green Shadow Ink
  4. There is no need for you to have to go out and hunt to mount some animal heads!  Enjoy your stamped menagerie!

I will be submitting this set of note cards to Virginia’s View Challenge #13: All Things Embossed!

Thank you so much for visiting my blog today and Happy Crafting!

Winnie & Walter First Birthday Bash Challenge – Mood Board & Shaker Card


Hi!  I’m back to play in some more Winnie & Walter Birthday Bash Celebration Challenges!  Here’s my second submission to the event!  I will be submitting this card for two challenges – Lea’s Mood Board Challenge and Julie’s Shaker Challenge.  This card was inspired by the insanely talented Nichol Magouirk.

See below for steps to reproduce:

  1. Create a landscape top-folding A2 card base out of Neenah Solar White 110lb. Cardstock
  2. Cut a frame out of a 4.25″ x 5.5″ piece of Neenah Solar White 80lb. Cardstock using the Spellbinders A2 Matting Basics A Dies
  3. Stamp the flowers and leaves from the Winnie & Walter The Big, The Bold and The Extras Stamp Set with Versamark Ink and heat emboss with Gold Hero Arts Embossing Powder
    1. Use Distress Ink (Seedless Preserves, Peeled Paint) to watercolor the roses/leaves
    2. Fussy cut (I need to learn how to do this better/faster without going blind or nipping my fingers! haha)
  4. Stamp the sentiment from the Winnie & Walter The Big, The Bold and the Happy Stamp Set onto Vellum with Versamark Ink and heat emboss with Gold Hero Arts Embossing Powder
  5. Fill the shaker part with assorted Pretty Pink Posh (6mm Sparkling Clear6mm Gold and 6mm Orchid) and Doodlebug Sequins (Lily White, Lilac)
  6. Adhere the card together using some foam tape (I doubled up on the foam tape for this card so that there is more room to shake!) and double-sided adhesive
    1. Tip: Use a powder tool on the inside of the shaker and along the edge of the foam tape to reduce static and prevent the sequins from sticking to the borders
  7. Embellish with assorted Pretty Pink Posh (4mm Sparkling Clear, 6mm Gold and 6mm Orchid) and Doodlebug Sequins with Zots Bling Dots
  8. Admire all those fun and pretty sequins on your card and SHAKE to your heart’s content!!

Thank you so much for visiting my blog today!  I am having so much fun participating in the Winnie & Walter First Birthday Bash Challenge and I hope you have the opportunity to play too!

Winnie & Walter First Birthday Bash Challenge – Gradient & Color Combo


Hi Everyone!  Winnie & Walter turns one this month and they are having a HUGE Birthday Bash Celebration with tons of challenges over on their blog!  This will be my first ever submission into a challenge!  Eeck!!  I will be sumitting this card for two challenges – Vanessa’s Gradient Challenge and Heather’s Color Combo Challenge.

Photo Jan 03, 8 17 49 PM

See below for steps to reproduce:

  1. Create a top-folding A2 card base out of Neenah Solar White 110lb. Cardstock
  2. Cut a 4.25″ x 5.5″ rectangle out of Neenah Solar White 80lb. Cardstock
  3. Create a striped background gradient using the My Favorite Things Plaid Background Builder Stamp Set with Hero Arts (Tide Pool and Soft Pool) and Avery Elle (Sea Glass) Ink Pads
  4. Stamp the sentiment from the Winnie & Walter The Big, The Bold and The Happy Stamp Set onto Vellum with Versamark Ink and heat emboss with Ranger Liquid Platinum Embossing Powder
  5. Adhere the card together using some foam tape and double-sided adhesive
  6. Embellish with assorted Pretty Pink Posh (4mm Sparkling Clear, 6mm Fresh Mint and 6mm Aquamarine) and Doodlebug Sequins
  7. Admire all those fun and pretty sequins on your card!!

Thank you so much for visiting my blog today!  I have become a HUGE Winnie & Walter fan during their first year (LOVE the The Big and The Bold Series).  I am so happy with the success that they have encountered and can’t wait to see what their second year brings!!

Divinata Seasons – Winter Holiday Card

I wanted to share another card that I made for the wonderful woman who introduced me to the amazing world of stamping.  I met her in 2013 during my honeymoon in Costa Rica and we are still in touch!  She was so kind as to send me a beautiful stamp set called Divinata Seasons so I used the winter image to create a holiday card for her!  I always cherish the happy mail I receive from her and thank the day that I met her!!

See below for steps to reproduce:

  1. Create a cardbase out of Neenah Solar White 110lb. Cardstock
  2. Create a frame using the stitched rectangle die from the Mama Elephant Basic Set Creative Cuts out of Neenah Solar White 80lb. Cardstock
  3. Create snow hills using the hill dies from the Mama Elephant Landscape Trio Creative Cuts out of Neenah Solar White 80lb. Cardstock
  4. Stamp the winter image from the Divinata Seasons Stamp Set onto Vellum with Versamark Ink and heat emboss with Hero Arts White Embossing Powder
    1. Color with copic markers on the backside of the vellum
  5. Create the background by stamping the birch tree stamps from the Mama Elephant Winter Wonderland Stamp Set with Walnut Stain Distress Ink (both first and second generation stamping)
  6. Stamp the sentiment from the Mama Elephant Merry Greetings Stamp Set using Hero Arts Tide Pool Ink
  7. Adhere the card together using some foam tape and double-sided adhesive
  8. Embellish with some Pretty Pink Posh 4mm Sparkling Clear Sequins
  9. Send it off to your crafting fairy godmother and have your fingers crossed in the hope that she likes what you made!!

Thank you so much for visiting my blog today and Happy Crafting!  I hope that you’ve been lucky enough to find a wonderful crafting friend in this warm and generous community!