Inky Backgrounds with Altenew!

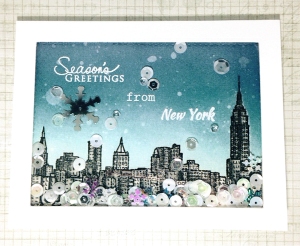
Hi!  I played with my Altenew Sketchy Cities America stamp set for the Altenew Instagram video challenge and the Simon Says Stamp Wednesday Challenge and got super inky with it (and now that Will Smith song is stuck in my head….waaaaah)!!  I couldn’t decide what kind of inky background I wanted so I created three!  And  yes, one is a holiday card but that background was singing christmas carols to me so I just had to do it!  hehe  Do you have a preference over these inky backgrounds behind a gorgeous New York City skyline?!
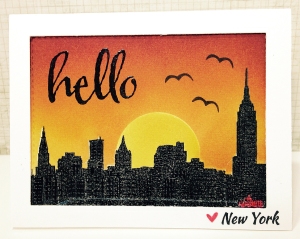
Altenew Sketchy Cities 2Altenew Sketchy Cities 3See below for steps to reproduce:

  1. Create a cardbase out of Neenah Solar White 110lb. Cardstock
  2. Create a frame using the stitched rectangle die from the Mama Elephant Basic Set Creative Cuts out of Canson 90lb Cold Press Watercolor Paper
  3. Stamp the New York City skyline from the Altenew Sketchy Cities America Stamp Set with Versafine Smokey Gray Ink and heat emboss with Ranger Clear Embossing Powder
  4. Create a mask for the Altenew New York City skyline and a circle out of Inkadinkado Stamping Mask Paper
  5. Mask the cityscape and create inky backgrounds with the following Distress Inks:
    1. Tumbled GlassSalty Ocean, Faded Jeans, Chipped Sapphire
    2. Tumbled GlassSalty Ocean, Faded Jeans, Chipped Sapphire, Dusty Concord, Antique Linen
    3. Mustard Seed, Spiced Marmalade, Barn Door, Dusty Concord
  6. Stamp a sentiment with the Papertrey Ink Signature Christmas Stamp Set, Winnie & Walter The Big The Bold and The Happy and Altenew Sketchy Cities America Stamp Set using Versamark Ink and heat emboss with Hero Arts White embossing powders
  7. Mist some water on the inky background with a Ranger Mini Mister filled with water and Tsukineko Sheer Shimmer Spritz
  8. Adhere the card together using foam tape and double-sided adhesive
  9. Embellish/Fill with some Pretty Pink Posh Sequins (8mm Sparkling Clear6mm Sparkling Clear, 4mm Sparking Clear, 6mm Winter Snow Mix), Doodlebug Lily White Sequins and Simon Says Stamp Snowflake Sequins
  10. Scrub really hard to clean those inky fingers that will take days to go back to normal flesh color!  haha

I will be submitting these cards to the Simon Says Stamp Wednesday Challenge Blog | Use Your Favorite Technique and/or Product.

Thank you so much for visiting my blog today and Happy Crafting!
Happy Twin Day!

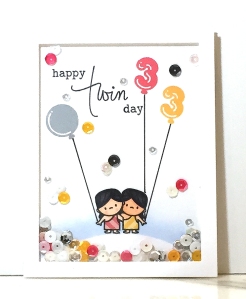
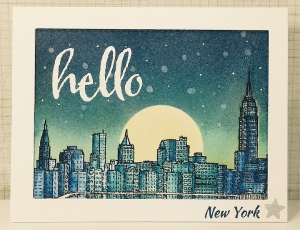
Hi!  So, my birthday is coming up the day after Valentine’s Day and I wanted to make a special card for my twin sister!  She is only a minute older than me but I definitely look up to her as my big sister.  I value her opinions and guidance more than anyone else in the world.  I am so lucky to have her in my life and was unbelievably blessed to grow up as a twin!  See below for a pic of us as young ‘uns with these huge cheeses on our face.

Hsieh Twins!

She has been so supportive of my papercrafting obsession and since shaker cards are her favorite, I thought this would be perfect!

Mama Elephant Cosmic Stars

See below for steps to reproduce:

  1. Create an A2 card base out of Neenah Solar White 110lb. Cardstock
  2. Cut a frame out of a 4.25″ x 5.5″ piece of Neenah Solar White 80lb. Cardstock using Mama Elephant Basic Set Creative Cuts
  3. Stamp the twins using the Mama Elephant Cosmic Stars Stamp Set with Memento Tuxedo Black Ink, color with Copic Markers (E000/E01, E00/E02, C05/C07/C09), paper-piece the dresses with Lawn Fawn Lets Polka Patterned Paper and fussy cut
  4. Stamp the sentiment using the Winnie & Walter The Big, The Bold and Happy Stamp Set and selectively ink “twin” from the Mama Elephant Merry Greetings Stamp Set with Memento Tuxedo Black Ink
  5. Stamp the balloons using the Mama Elephant Balloon Et Cetera Stamp Set with Hero Arts Shadow Inks (Pale Tomato, Butter Bar, Soft Granite)
  6. Use a mask to create a little hill for the twins to stand on with Hero Arts Soft Sky Shadow Ink
  7. Embellish the card/Fill the shaker with assorted Pretty Pink Posh (6mm Watermelon, 6mm Marigold, 6mm Charcoal, 6mm Sparkling Clear4mm Sparklng Clear) and Doodlebug Sequins (Lily White)
  8. Adhere the card together using some foam tape (I doubled up on the foam tape for this card so that there is more room to shake!) and double-sided adhesive
    1. Tip: Use a powder tool on the inside of the shaker and along the edge of the foam tape to reduce static and prevent the sequins from sticking to the borders
  9. Give your brother/sister a call for no reason other than to talk after shaking this card!!

I will be submitting this card to Virginia’s View Challenge #12 – Shaker Cards.

Thank you so much for visiting my blog!

Thank You Panda Shaker 2

This card was inspired by the below card created by Paulina from Pretty Pink Posh.  She always creates the cutest little window scenes on her cards that I just had to try!


This is the second Thank You Shaker Card for my sister’s friend.  I am so in love with Mama Elephant, in particular with the Pandamonium Stamp Set, and am obviously obsessed with shaker cards as you can see from my recent blog posts!

Panda Thank You Shaker Card 2

See below for steps to reproduce:

  1. Cut an A2 card base out of Neenah Solar White 110lb. Cardstock
  2. Use the smallest die of the Spellbinders Nestabilities Large Classic Rectangle Dies Set to create windows on pink cardstock
  3. Cut a rectangle piece out of acetate to match the dimensions of the pink window above and adhere together
  4. Cut a rectangle piece out of Neenah Solar White 80lb. Cardstock to match the dimensions of the pink window above
    1. Use Mama Elephant Pandamonium Stamp Set and Coordinating Dies to stamp and cut the panda images
    2. Use Paper Smooches Many Thanks Stamp Set to stamp the sentiment in Versafine Onyx Black Ink
    3. Use Lawn Fawn Penelope’s Blossoms Stamp Set to stamp the flowers and stems in Hero Arts Pale Tomato Shadow Ink and Hero Arts Green Hills Shadow Ink
    4. Use Lawn Fawn Grassy Border Lawn Cuts to create two strips of grass
  5. Use Doodlebug Designs Assorted Sequins and Pretty Pink Posh Sparkling Clear Sequins to fill the shaker
  6. Adhere the shaker pieces together making sure to use foam tape to pop up the window panel
  7. Cut a piece of vellum large enough to create a 1/4″ border around the window frame
  8. Cut a piece of Lawn Fawn Lets Polka Cardstock large enough to create a 1/8″ border around the vellum
  9. Cut the A2 card base large enough to create a 1/8″ matte
  10. Layer and adhere all the pieces together
  11. Shake!

Thank you so much for visiting my blog!  I hope you are having a lovely day!

Thank You Panda Shaker

This card was inspired by the below card created by the ridiculously talented and absolutely hilarious, Laura Bassen:

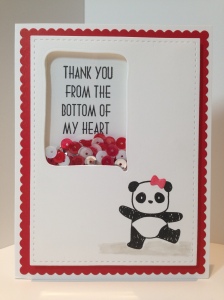
My sister’s friend asked for a Thank You Shaker Card in red for a bridesmaid.  I just had to use this cute little panda image from Mama Elephant!

Photo Aug 30, 3 29 30 PM

See below for steps to reproduce:

  1. Cut an A2 card base out of Neenah Solar White 110lb. Cardstock
  2. Use the Mama Elephant Basic Set Creative Cuts to die cut a scalloped frame from red cardstock
  3. Use the Mama Elephant Basic Set Creative Cuts to die cut two pieces of Neenah Solar White 80lb. Cardstock
  4. Use the Mama Elephant Love Quotes Creative Cuts to die cut the quote bubble into a panel
  5. Cut a piece of acetate to create the window for the quote bubble and adhere to the panel
  6. Use the Mama Elephant Pandamonium Stamp Set to stamp the panda image on the bottom right of the panel
  7. Use the Mama Elephant Honey Bunny Creative Cuts to die cut a little bow and use Hero Arts Pale Tomato Shadow Ink to color the bow
  8. Use Doodlebug Designs Assorted Sequins to fill the shaker
  9. Adhere all the pieces together, making sure to use foam tape to pop up the window panel
  10. Shake!

Thank you so much for visiting my blog!  I hope you are having a wonderful Labor Day Weekend!

Pretty Pink Posh: Cutting Edge Blog Hop Card #2


Hi Everyone!  Today is the last day to enter into the Pretty Pink Posh blog hop!!  My second card is inspired by JJ Bolton’s lovely cloud background and this gorgeous spring card that the talented Lisa Spangler created here:

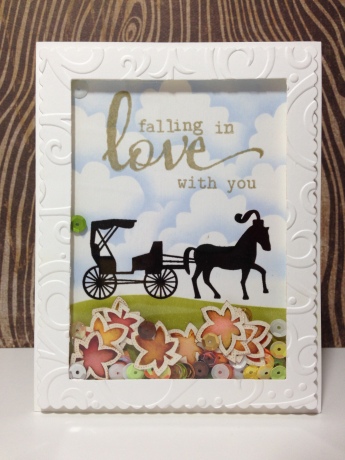
Since fall is right around the corner, I thought it’d be great to create a card featuring some lovely autumn colors.  Since i’m absolutely obsessed with shaker cards ever since Paulina from Pretty Pink Posh hosted her first blog hop, I had to make another one!

Photo Aug 25, 6 04 33 PM


See below for steps to reproduce:

  1. Create an A2 card base out of Neenah Solar White 110lb. Cardstock
  2. Use the Mama Elephant Basic Set Creative Cuts and the Spellbinders Card Creator A2 Matting Basics Dies to create a frame
  3. Run the frame with the Darice Swirls Embossing Folder through the Cuttlebug
  4. Adhere acetate to the frame to create the window for the shaker
  5. Use the Mama Elephant Central Park Stamp Set to stamp and emboss the horse-drawn carriage in black
  6. Use the Winnie & Walter The Big, The Bold and You Stamp Set as well as The Big, The Bold and the Happy Stamp Set to stamp the sentiment in Encore Gold Pigment Ink and heat emboss
  7. Use the Mama Elephant Landscape Trio Creative Cuts to die cut a hill and use the negative image as a mask to blend Peeled Paint Distress Ink
  8. Blend the clouds using a stencil (purchased from Impress Cards and Crafts) and Hero Arts Soft Sky Shadow Ink
  9. Stamp and cut out some leaves from watercolor paper and use water and Distress Inks (Fired Brick, Spiced Marmalade, Mustard Seed, Forest Moss, Vintage Photo) to create some fall embellishments!
  10. Sprinkle in some sequins because how can you have a shaker card without sequins?!
  11. Adhere frame to cardbase with foam tape
  12. SHAKE!

Thank you so much for visiting my blog today!  I am having so much fun on this blog hop and I hope you are too!